What is the Hughson Westlake procedure?
What is Hughson Westlake?
Hughson Westlake, otherwise known as the ascending method, is an automatic pure tone test procedure that was originally developed in 1944 and adapted for automatic testing in the 1960’s.
It is based on the principle that short tone bursts are better heard against a background of silence rather than a continuous tone separated by a short interval when the level is being changed.
The procedure uses short bursts of tone, beginning at a clearly audible level, decreasing in levels of 10dB until the patient no longer responds. From this point the tone is increased in 5dB steps.
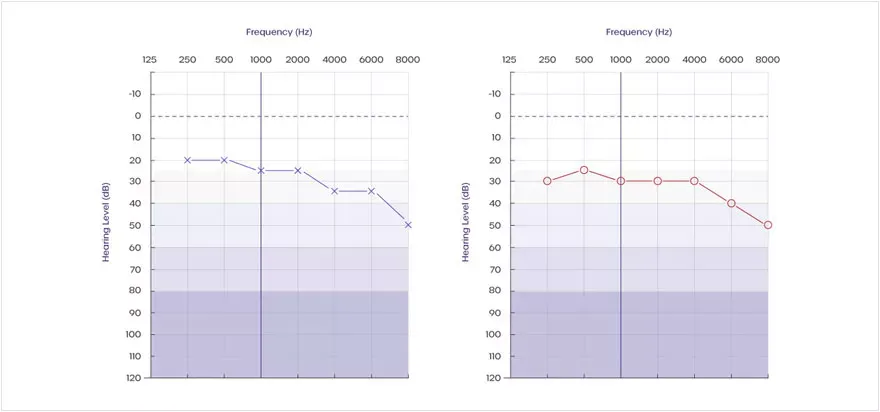
To determine a hearing threshold, two out of three, or three out of five ascending responses at the same intensity (dB level) are required. This is then recorded on an audiogram as the hearing threshold.
How to perform the procedure manually
- Start by providing the patient with clear instructions i.e., You will hear a series of tones. Press the response button whenever you hear a tone, no matter how loud or how quiet or which ear you hear the tones in
- Familiarise the patient - present a tone that is easily heard (approx. 50dB), and check that the patient responds
- If the patient does not respond, increase the tone by 20dB and continue until they do
- Begin the test at the intensity found during this familiarisation process
- Reduce the intensity in 10dB steps until the patient no longer responds
- When the patient fails to respond to a signal, increase the tone in 5dB steps until a response is received
- Repeat steps 5 and 6 to check for accuracy. A minimum of two out of three, or three out of five identical responses are required to accurately determine and record the patient’s threshold
- Repeat steps 5, 6 and 7 at each frequency included in the test sequence in both ears. A common sequence would include 1KHz, 2KHz, 3KHz, 4KHz, 6KHz, 8KHz, 500Hz. The test should always begin at 1KHz as this is where hearing is most sensitive
- Make sure to test both ears as outlined above.
How to perform the procedure automatically
- Start by providing the patient with clear instructions i.e., You will hear a series of tones. Press the response button whenever you hear a tone, no matter how loud or how quiet or which ear you hear the tones in
- Select ‘auto’ test on the audiometer
- The automatic test will begin by familiarising the patient
- Once familiarisation is complete, the test will begin
- Begin the test at the intensity found during the familiarisation process
- The automatic test will follow the same procedure as per steps 6, 7, 8 and 9 above for manual testing
- The determined threshold/s will be stored automatically.
Which ear should be tested first?
Test the better ear first. If there is no ‘better ear’, then it does not matter which one you test first. It can be beneficial to consistently start with a particular ear when hearing is relatively equal in both, as this can help to reduce the risk of error.
The up 5, down 10 rule
After you have made the initial descent to a point when the patient does not hear the tone, start increasing the intensity in 5 dB steps, then decrease it by 10 dB whenever the tone is heard. The patient’s threshold is determined when you find the lowest level at which they respond in at least 50% of three trials. Also, when you have verified that they do not respond to at least 50% of three trials at a level that is 5 dB lower.
Equipment and training
Amplivox provides an extensive range of intuitive and accurate audiometry equipment with automatic Hughson Westlake testing. For more information on any of our audiometry products please visit our audiometers webpage, contact our customer support team on +44 (0)1698 208216, or email.